WebDAV-Verbindungen
Inhalt
[
Verbergen
]
WebDAV-Verbindungen stellen eine Möglichkeit dar, Verbindungsdaten zu verschiedenen WebDAV fähigen Diensten zentral zu hinterlegen. Auf die hinterlegten Verbindungsdaten kann später in der Aktion "Speichern mit WebDAV" komfortabel zugegriffen werden, ohne dass alle Benutzer die Zugangsinformationen kennen müssen.
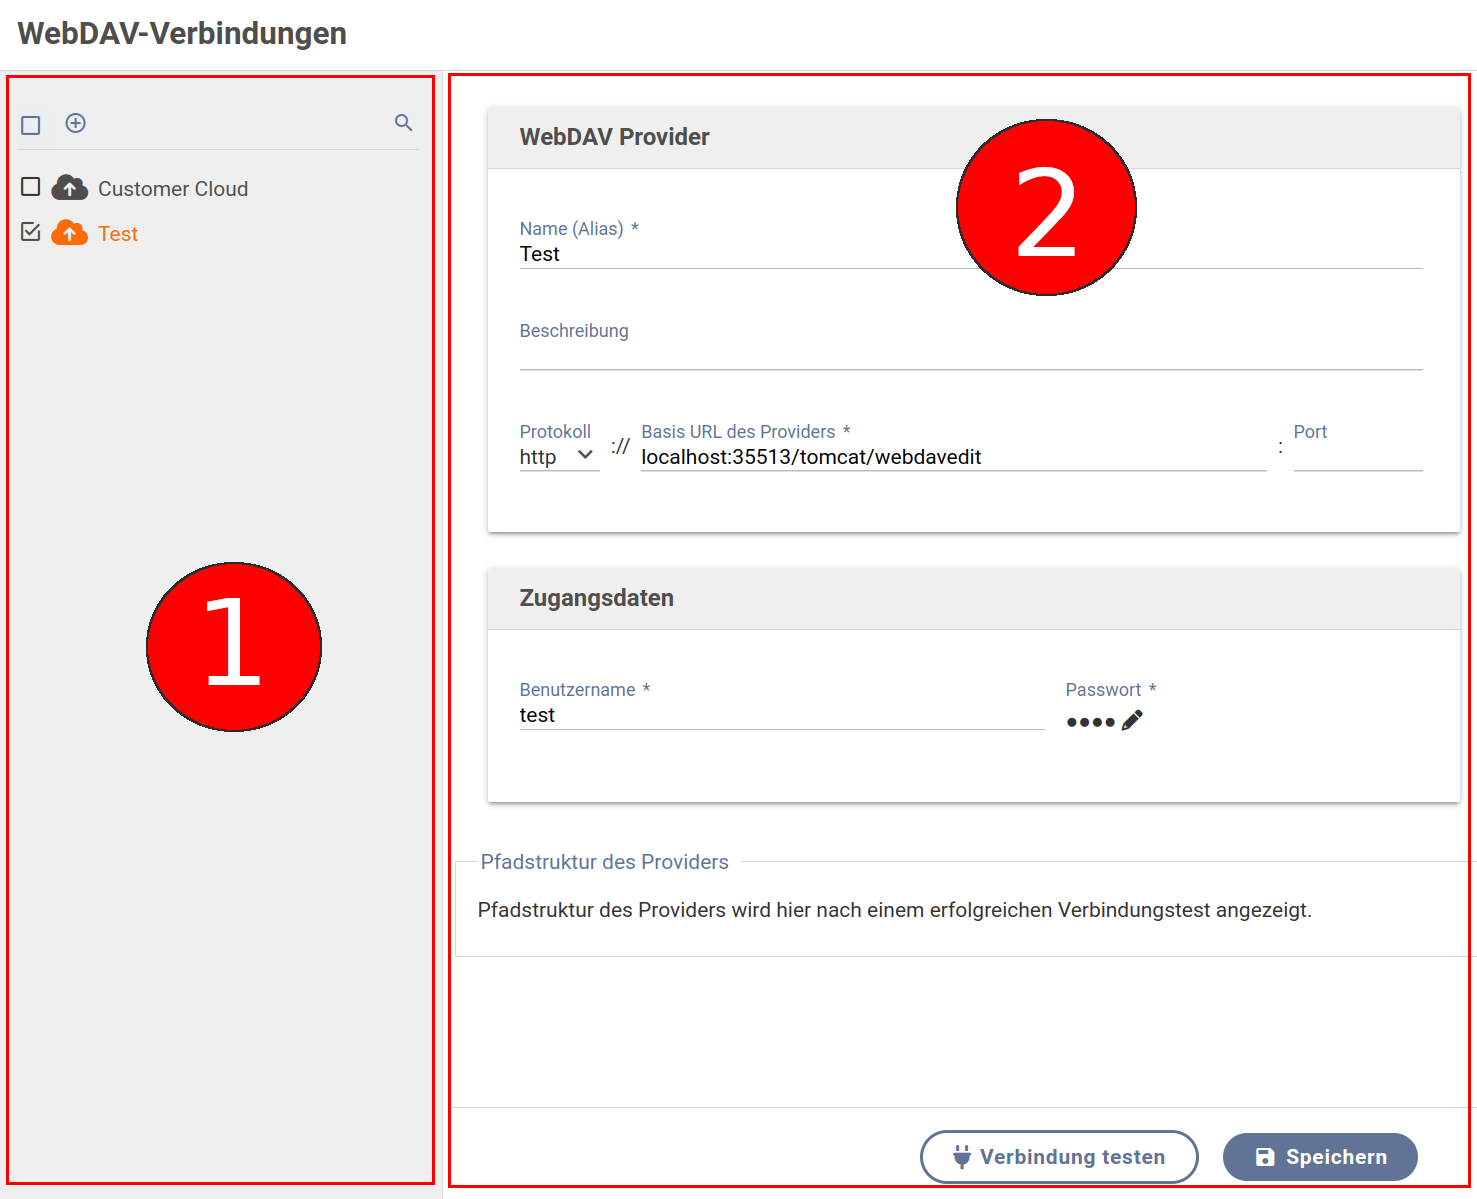
Anlegen einer WebDAV-Verbindung in Xima® Formcycle. (1) Auf der linken Seite befindet sich eine Liste der existierenden WebDAV-Verbindungen. (2) Rechts können Benutzer die selektierte WebDAV-Verbindung konfigureren.
WebDAV-Verbindung anlegen
- Öffnen Sie das Modul "WebDAV-Verbindungen" und klicken Sie auf die Schaltfläche "Neu" in der Kopfzeile der Liste (siehe Abbildung).
- Vergeben Sie einen beliebigen Alias und eine optionale Beschreibung.
- Für die WebDAV-Verbindung selbst werden folgende Daten benötigt:
- Protokoll: Aktuell stehen HTTP und HTTPS zur Verfügung.
- Basis URL des Providers: Die Adresse Ihres WebDAV fähigen Dienstes.
- Port: Standardmäßig wird Port 80 für HTTP sowie 443 für HTTPS verwendet. Falls abweichend muss dies hier angegeben werden.