Roles
General information
The administration interface of Xima® Formcycle is divided into different modules. By means of the role management, it is determined which modules and functionalities are available for users in this role.
Initially, the following two roles are available.
- Inbox agent
- Default role for a user that may only access the inbox.
- Client administrator
- Default role for the administrator that is granted access to all features.
Creating a new role
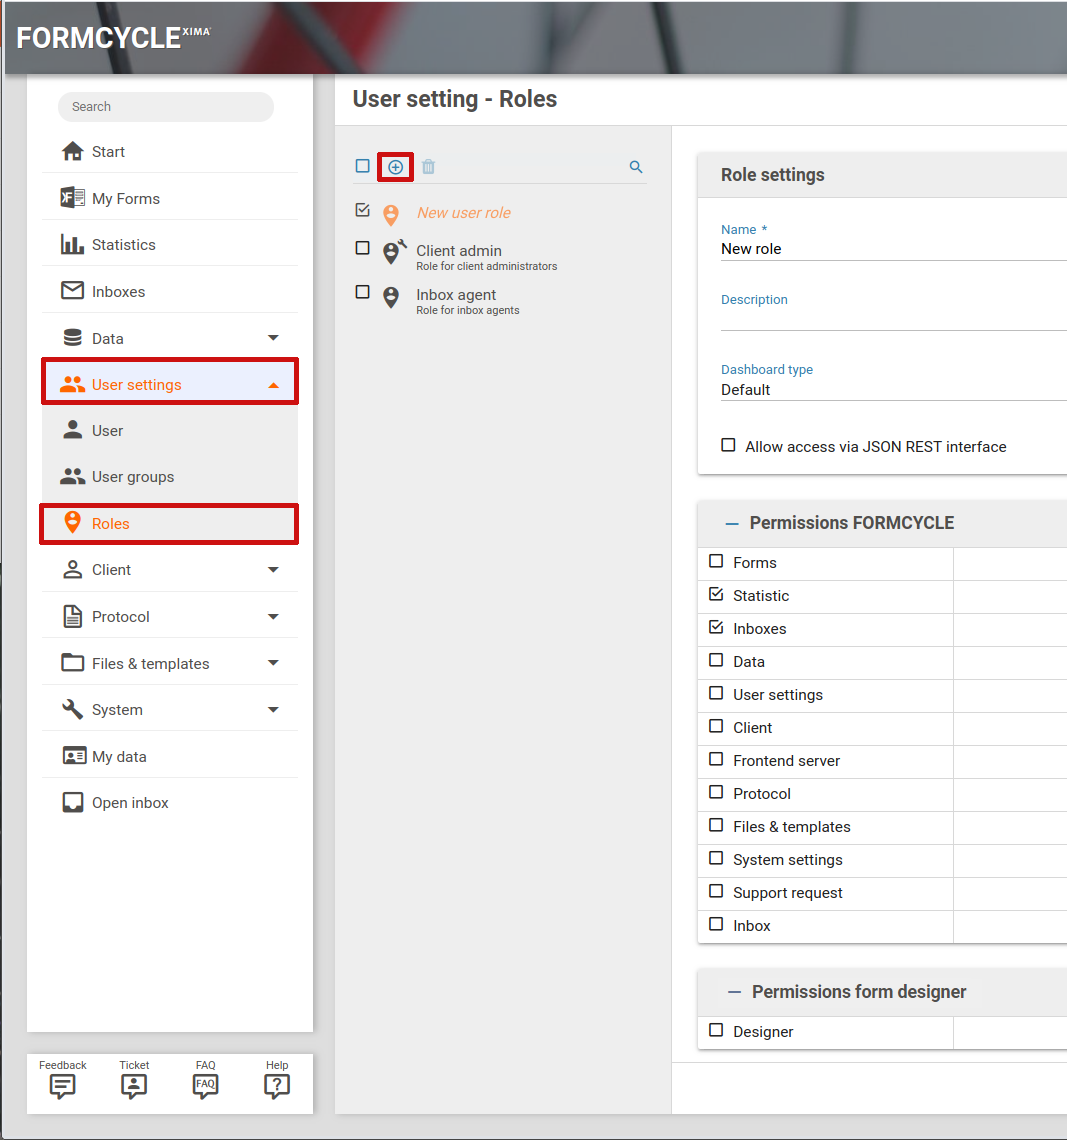
To create a new role, go to the menu User settings Roles. Click on the button, enter a name for the role and select the permission granted to all users assigned to the role.
For each role, you can edit the following base settings:
- Dashboard type
- The dashboard page that is used for all users that are assigned to this role. More dashboard pages may be installed via plugins.
- Allow access via JSON REST interface
- Whether users assigned to this role are granted access to the JSON HTTP REST interface provided by Xima® Formcycle. Please note that this REST interface is deprecated and should not be used anymore.
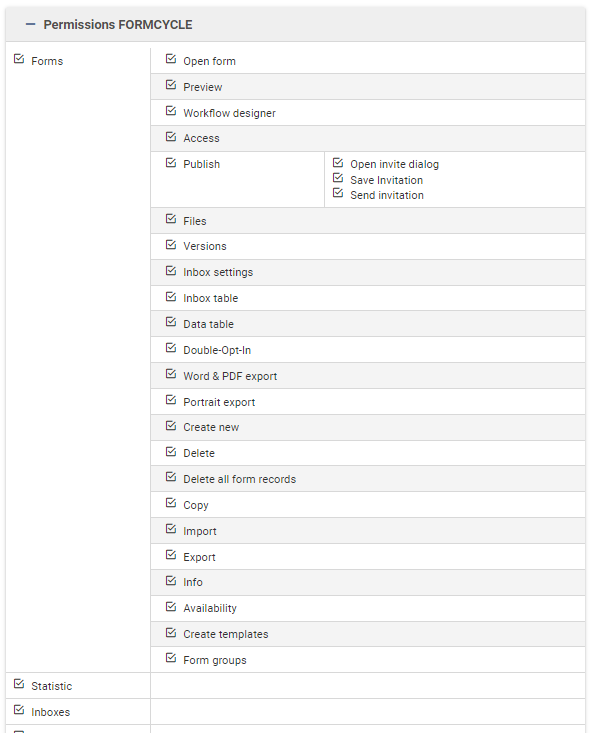
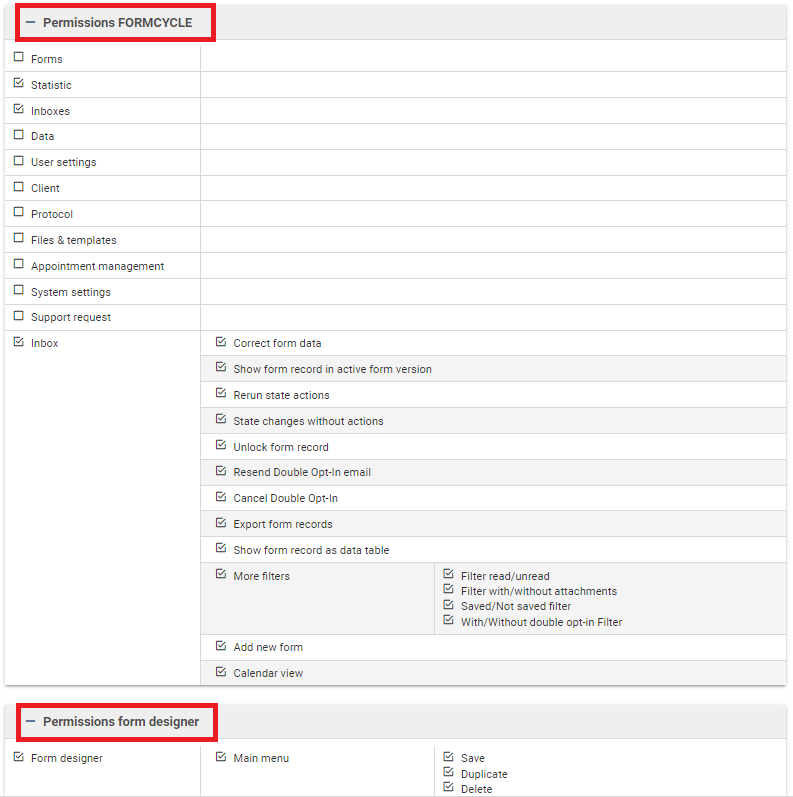
The access permissions are split into the following two groups. Some permissions consist of several more specific permissions that you may grant or deny individually.
- Permissions FORMCYCLE
- Permissions for the backend
- Permissions Designer
- Permissions for the Xima® Formcycle Designer
To save the configuration, click on the save button at the bottom.
Deleting a role
To delete a role, first select the role and then click on the button. However, please note that a role may not be deleted if some users are still assigned to this role.