Client settings
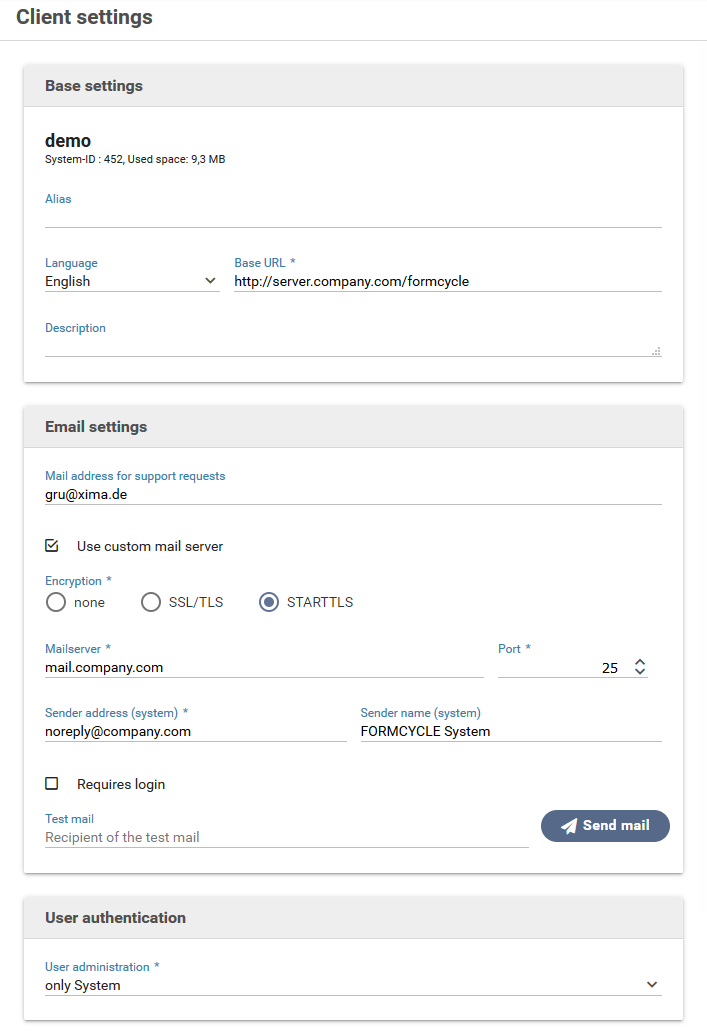
Base settings
Name
The name of the client as it was assigned when the client was created. In addition, the system-internal ID and the total memory occupied by the client are also displayed.
Alias
An alternative or alias name for this client. The alias name is a unique identifier for this client and can be used to generate easier to read links to your form. For example, it lets you open a form with a link like https://formcycle.eu/form/alias/mandant/myform instead of https://formcycle.eu/form/provide/692. See also how to publish your form.
Language
Default language for forms, when no language has been specified such as by URL parameters.
This setting does not affect the language of the configuration interface of Xima® Formcycle, which will be determined either automatically by the browser's preferred language, or it can be chosen manually on the sign in page.
Base URL
The base URL is used as the first part of the URL that will be used to open forms. Users of the form should be able to access this URL. For example, when the base URL has been set to
http://pro.formcloud.de/formcycle/, the URL to the form would look like this: http://pro.formcloud.de/formcycle/form/alias/<clientId>/<formName>
Description
An optional short description for this client.
Maximum number of forms
This setting can only be viewed and changed by the superadmin or sadmin of a cloud installation. This number defines the maximum number of forms that can be turned online simultaneously. If the number "0" is set here, the maximum number of forms that can be turned online defined in the license will be used.
Maximum number of invites
This setting can only be viewed and changed by the superadmin or sadmin. This number defines the maximum number of invites that can be send in one invitation step. The number "-1" means unlimited number of invites. If the number "0" is set here, the default maximum number of invites that will be used (cloud demo clients: 10, cloud clients: 100, others: unlimited).
Support settings
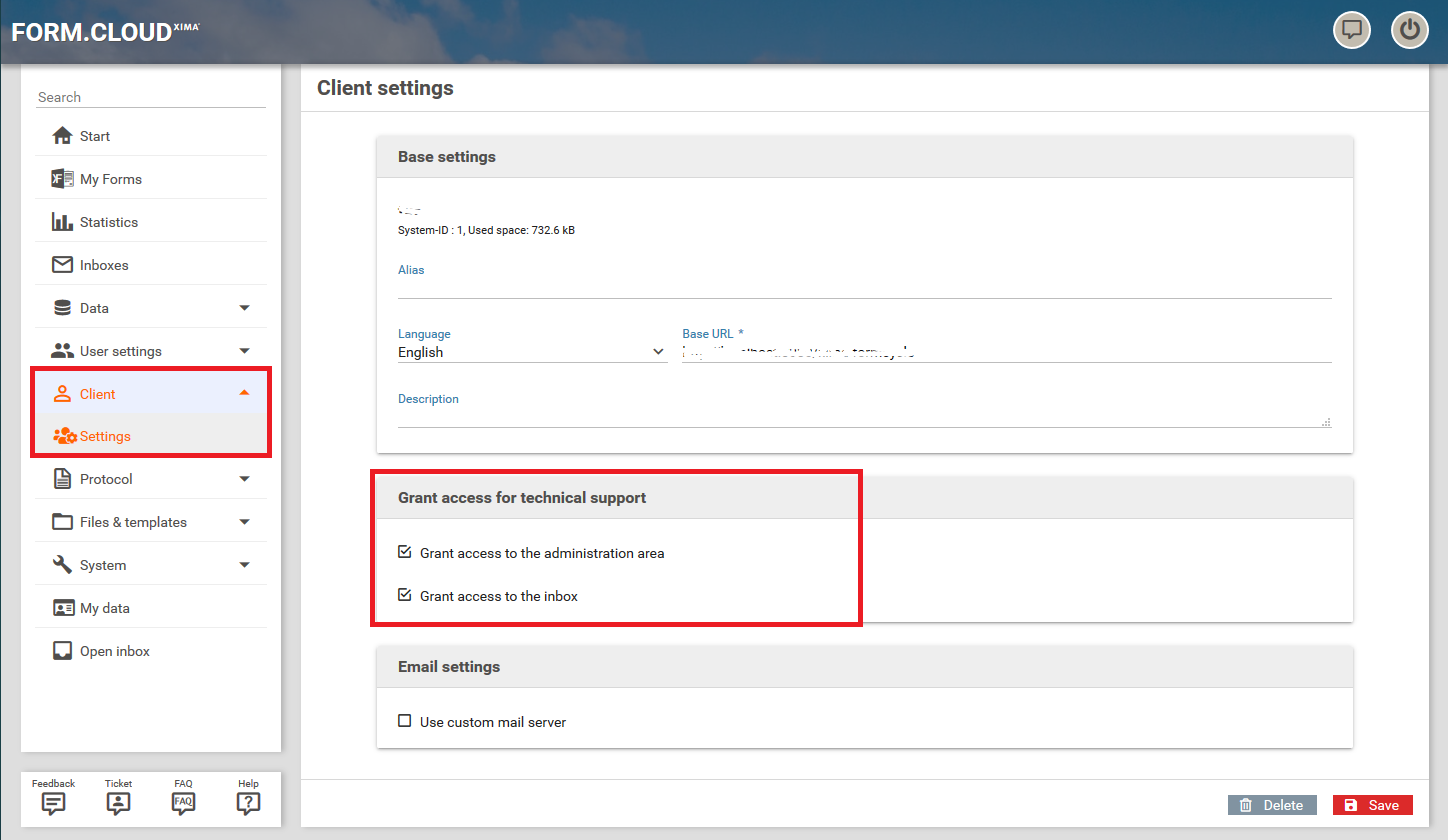
These settings can be seen in a cloud environment only.
- Grant access to the administration area
- Sometimes the support team requires access to the backend of Xima® Formcycle to help you out. This may be the case, for example, when the support needs to check some technical settings. Only a client administrator may grant access.
- Grant access to the inbox
- Once access was granted, you can grant access to the inbox as well, if required. Please note that the inbox may contain personal data which the support team may get access to. Do not grant access unless it is absolutely necessary. Once the support team is done, revoke the access by unchecking these options.
Mail settings
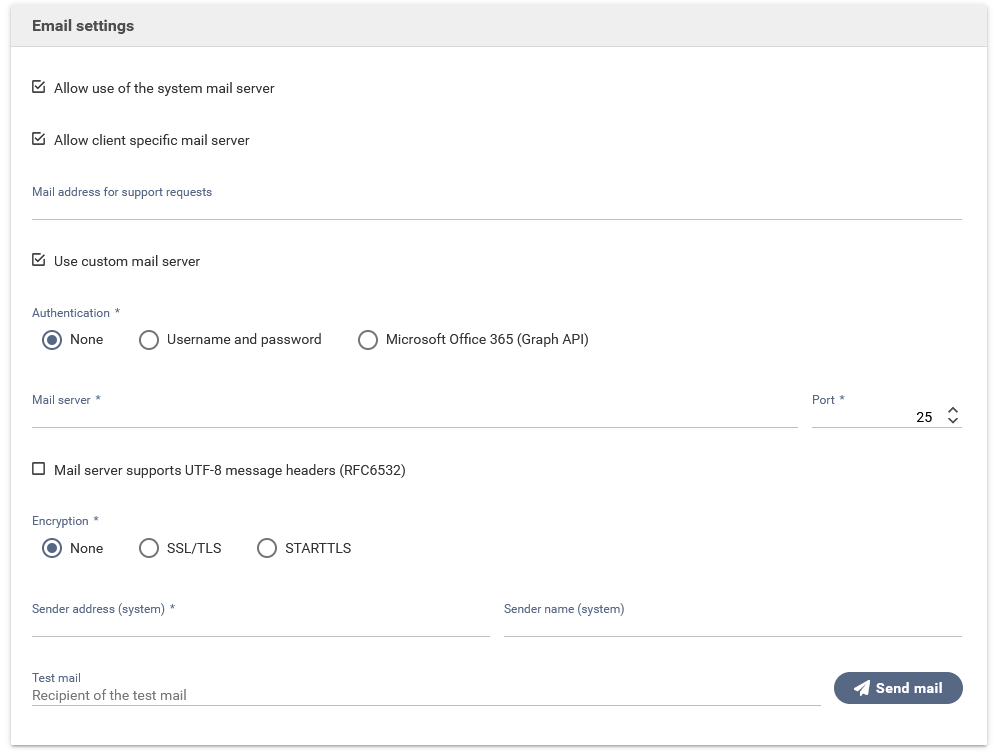
Allow use of the system mail server 7.3.0+
Allows the system administrator to enable/disable the use of the system mail server for this client. If this is disabled, functionalities that require an e-mail server will only be available when configuring a client-specific e-mail server.
Allow client specific mail server 7.3.0+
Allows the system administrator to enable/disable the configuration of a client-specific email server. If this is disabled and the use of the system mail server is not allowed, no functionalities which require an e-mail server are available to this client.
Mail address for support requests
The email address to which support requests are sent to. By default, when this is left empty, the global email address as set for the system is used. This setting may not be available when the system administrator did not allow it.
Use custom mail server
A mail server should be setup for each client. When no mail server has been configured, the system mail server will be used when it is available. In case no system mail server was configured, no emails can be sent, even if a client-specific mail server exists.
When no mail server is available, the following services will be deactivated:
- Forgot password and Reset password (sending recovery mails)
- Actions of type Email
The following mail server options can be changed:
- Authentication 7.3.0+
- Specifies the type of authentication to the e-mail server
- Mail server
- The mail server used for sending mails of this client. Mails will be sent by actions of type email and by the system when a password needs to be reset.
- Port
- The SMTP port to be used. When not port is specified, the default SMPT port 25 will be used.
- Server supports UTF-8 message headers (RFC6532)
- When the email server supports UTF-8 message headers according to RFC6532, this option should be enabled. You can then send email to internationalized email addresses such as 山田太郎@株式.会社.
- Encryption
- Type of encryption to be used for the communication with the mail server.
- Authorization required (until 7.3.0)
- When the mail server requires authorization, enable this option and enter the username and the password.
- Sender address (System)
- The mail address to be used as the sender address (mail form) for mails sent by the systen, eg. for password recovery mails.
- Sender name (System)
- The sender name that is to be used for system e-mails.
Username and password

- Username
- The username to access the email server.
- Password
- The password for the username
Microsoft Office 365 (Graph API) 7.3.0+

- Directory (tenant) ID
- Unique ID of the directory (tenant), which is used for sending the emails. You can find this in the overview of your Azure tenant.
- Application (client) ID
- Unique ID of the application (client). After creating a new app registration, you can take it from the list of registrations.
- Client secret
- Secret key which is used to authenticate your client. After creating a new client key within Azure, it is displayed temporarily. It is not possible to view it later, so it must be created again if it is lost.
User management
Change how users and user data should be managed. The following options are available:
- only System
- Users will be managed only by Xima® Formcycle. Users can be added or removed on the user management pages.
- only LDAP
- All users are taken from LDAP account and cannot be created manually.
- LDAP and System mixed
- When you create a new users, you can choose whether the user should be linked to an LDAP account.
Changing the user management settings
You can change how users are managed at any time. However, you should check whether all unauthorized users have been removed.
- Switching from System only to LDAP and System
- Switching from System only to LDAP only
- All existing users will be kept and can still sign in. Check whether these users should be removed.
- Switching from LDAP and System to System
- Switching from LDAP to System
- All LDAP users are still referenced in the user management, but will not be able to sign in anymore and should be removed, unless you intend to change back LDAP at a later time.